Thursday, April 5, 2012

Chocolate. Chip. COOKIES!!!!


      I was really missing le other homeland the other day and thought what better way to honor it than making some good ole Chocolate Chip Cookies??  Sure, they have cookies of all sorts at the store but those are usually complete crap and I wanted to make my own. I mean, what's better than a fresh cookie out of the oven!? Nothing. Absolutely nothing. 
   
      Now, let me just start off by saying I am in no way a baker. I'd love to be, but I'm not. Cooking and baking are two different things. You might actually end up with something tasty by throwing a bunch of ingredients together and cooking them but the chances are slim if you're gonna bake them with things that include flour, baking soda and powder and the like. I admire and applaud people who bake delicious breads and desserts for a living cause it is not an easy thing to do. It might not be rocket science but it sure involves a whole lot of chemistry. You need patience and discipline and recipes actually do matter in this world. Precise measurement is key not to mention self control because Lord knows I'd be 600 pounds if I made desserts for a living (my sweet tooth is ridiculous...).  

Smooshing the sugars and butter
      Anyway, I'm not a baker/pastry person but I do love learning about the art of it all and experimenting at home. I made a batch of pretty bomb brownies last week but I didn't get to take any pictures of them....which in result probably doesn't even need to be included in this post but I'm too lazy to hit the backspace button so on here it shall stay!

Add egg one at a time
    So I decided to make these cookies...which by the way I've never made before. I know....how sad...an American girl...a COOK nonetheless and I had never made chocolate chip cookies from scratch before! The horror. Well, sue me.  I did them though and they came out pretty damn tasty!

    Now, my biggest obstacle was that I didn't have a mixer (although I am DYING for a Kitchen Aid in Green. Birthday is on December 12th...in case anyone has any ideas ;-])  so at first I was hesitant thinking it wouldn't be able to be done by hand. But then I thought....that's ridiculous....chocolate chip cookies were being made long before mixers came around ( I'm pretty sure the oldest chocolate chip cookie recipe dates back to the Paleolithic times....not 100% sure though, I'll keep you guys posted. :-P) so I searched the handy dandy net and found a recipe. Now, I'm sure if anyone has observed from previous posts...I hate writing recipes out and I just hate recipes in general but I can't exactly leave you guys without l one for these cookies. Like I said before, baking does require precise measurements.

Mix the rest in and voila!
   Lucky for me, the wonderful world of the internet has this fantastic thing where you can add a link to whatever the hell you're writing which saves me time and trouble and gives credit to the source. So here it is, without further ado....le link: How to make Chocolate Chip Cookies (without a mixer).

    Only tweak I did to this was to add about half a teaspoon of cinnamon, some hazelnuts and white chocolate I had left over from that batch of brownies previously mentioned.

  Those suckers came out pretty damn delicious if I do say so myself!! They were definitely the dense, chewy kind of cookies, my favorite kind. The following are the only observations/tips I can provide:

- I used light brown sugar but next time I will dry the darker sugar instead. Definitely not bad with the light sugar but I think the darker one will give the cookies a deeper color. Taste wise it was fine although I have a feeling the dark brown sugar will dissolve better than the light.

-  The recipe says to bake the cookies at 375 F/190 C for about 9-11 minutes but I found that mine needed just a tad bit longer. I cooked mine for about 12-14. Maybe it was the oven I was using. Regardless, keep an eye on them.

- Almost every chocolate chip cookie recipe I have come across always calls to add the chips/nuts at the very end of the process. Well, making cookies by hand isn't necessarily hard but it does require some arm strength. After you mix all your wet ingredients with the sugar, it will tell you to add the flour and the rest of the dry ingredients and to carefully mix until everything is incorporated.  As you're working everything together, the dough become harder and harder to incorporate as the flour mixes in with everything else but you must be careful while doing this. You do not want to over mix the dough so be thorough every time you move your spatula around the batter. My point being, what the hell is the point of adding the chips last and try and incorporate them into an already pretty sturdy dough while at the same time being careful not to over mix? So, next time, I am adding my chips right before I add my flour to avoid almost losing an arm. (I kid. If anything, I'm making some muscles!).

   So yeah...that is all I can think of in terms of pointers. I will definitely play around with more recipes in the future but this one is definitely a solid one. Damn fresh baked cookies of any kinda are SINFUL....but so damn worth it!!! Make them!!


Monday, March 26, 2012

Cooked Cabbage with Sausage. Damn Skippy.


   I freakin love cabbage. Seriously. I like it raw or cooked, it doesn't even matter. I don't know why, it's not like it has any bold flavor but I think that's what I like it about it, it's delicate-ness. So yeah, there I was over my friends house visiting her and her adorable little baby. She had to run for some errands so I stayed home with the little one....I decided to just start cooking so it could all be ready when she came home (Hey, new moms are heroes, gotta show our appreciation any way we can!). So I did what any cook would do, I raided her fridge. :) I found some delicious looking sausages in the freezer which I decided to thaw and then looked around her veggie section and saw there was a generous amount of cabbage laying around so I went to town.

  This really is a quick and easy dish. I thawed the sausages and cooked them for about 10 minutes or so in simmering water and then sliced them up (save the liquid). Then I took a pan and heated it up with just a touch of olive oil and browned the sausages.

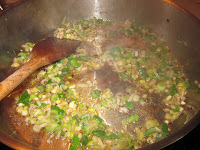
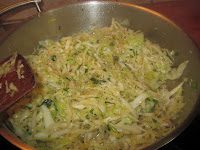
    I cut up a few green onions and cloves of garlic that I found and sauteed them. I chopped the cabbage and added that in there as well. Incorporate everything well and let the cabbage cook for about 3-4 minutes. This would be a great time to add a little bit of dry red wine to the mix but since I couldn't find any, I just poured in one can of tomato chunks (had I been at home I would have just used fresh tomatoes...you know me!). My spices consisted of a few bay leafs and this pepper like spice that we call here in Greece "Bahari" but for the life of me I cannot find the name of it in English. My quest will continue though, because it's driving me nuts! { It's allspice!! God I'm retarded!!!} Anywho, season with salt and pepper to taste, bring it up to a quick boil and then to a nice slow simmer (I love how I changed persons throughout the course of this post...). At this point I also love to add a nice generous portion of olive oil to the mix.  If you feel like your meal needs a little bit of liquid to cook in, just add a little bit of the water you simmered your sausages in. This tasty treat is ready when your cabbage is cooked and there is no liquid left.

    It's just...so.....delicious!! The sausages give it such a rich and heavenly flavor. The cabbage is soft and subtle and compliments the bold and full flavor of the sausage perfectly.  Also, a great vegetarian version to this is so add some rice to your cabbage and the liquid needed for your rice to cook in and you got a great rice/cabbage combo.  However, there was nothing vegetarian this time around....it was in your face fat and flavor...and it was SO worth it!


Saturday, March 10, 2012

Chicken and fries


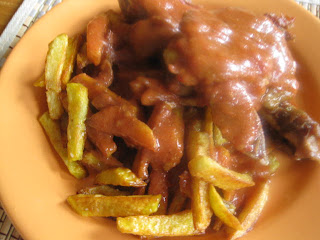
       What's better than a dinner that include fries? And no, I'm not talking about your good ole burger and fries deal. I'm talking about homemade french fries. Yes, there is such a thing. Home made fries with some chicken in garlic/tomato sauce on top. It's just so. Sinfully. Good.  I would just like to include a small but kind side note at this juncture and excuse the quality of the pictures for this post. They basically suck balls.  I don't know why but the camera gods were just not cooperating with me today and no matter what setting and angle I took the pictures in, they were just not coming out as they should. Plus the food was gonna get cold so I said fuck it and just started grubbin'.  So yeah, sorry for the not so great quality pics but I assure you, it was delicious. :D

      So the chicken:

    Our poultry today was actually rooster, the neighbors rooster in fact given to us as a gift (RIP Cockadoodle). Does it taste better than the nasty crap-fed, cage-living chickens they sell at the stores? You best your sweet beak it does BUT...keep in mind that true free range poultry will be a tad tougher so they'll need a little longer to cook but even when their meat is falling off the bone, they will be just a little chewier and gamier but a whole lot tastier. I realize most people don't have a neighbor that has chicken running around but you can request a free range chicken from your local butcher if you can. Bottom line, just know where your bird is coming from as much as you can.

    So, cut your bird into your desired pieces, season it well, generously pour some extra virgin olive oil in a pot and place your pieces in the oil once it's well heated. Cook on both sides until it's a nice golden color.  Add your garlic. Lot's of it. Seriously. I think I literally used about a head and a half of garlic for this rooster. Mince, slice, chop, do whatever you want.. You can put it in a blender at the end (like I did) and just blend it all together anyway.  So, once you add your garlic, let it cook in the oil for no more than about a minute and then add your grated, fresh tomatoes (I used about 3-4 medium sized tomatoes for this). You can also add onions to this but this time around I decided to keep it even more simpler and just go with the garlic. Season, add a few bay leafs and about 2 sticks of cinnamon (or about a teaspoon of ground). That's it. Let it come to a boil and once it done, reduce the heat and leave it alone for about an hour and a half to two. Check and stir occasionally and make sure the sauce is always at a low simmer. Once the meat can easily be detached from the bones, you're ready. Now, like I said before, I went ahead and took the sauce (omitted the bay leaf of course) and passed it through the blender briefly so the garlic, oil and tomato can really come together and it becomes one smooth uniform sauce. Definitely not necessary but what can I say....I got into restaurant mode for a second there...

    Now the french fries.


Ah, the fries. OK, let me just start off by saying that if you're gonna bust out with any of that crappy frozen pre-cooked McCain fries bull, don't even bother. If you're gonna use store bought frozen fries for this lovely meal, you are doing yourself a huge disservice.  This sauce is GREAT with any type of pasta, rice, mashed potatoes...you name it so if you're thinking of using pre cooked potatoes for this, I highly recommend you rethink you starch option all together. Home made fries are so easy that there really isn't any excuse to not make them.  All you do is peel, cut, salt and fry. You can use a pan or even a pot to avoid any oily mess, fill it up with some frying oil (we actually use olive oil but since it is a pricey oil, this is about the only time I personally condone using any other kind of oil for cooking....but that's just silly old me.) Turn your pan on and let the oil get nice and hot. Once it's hot (test it with a fry. Drop one in and if it starts to sizzle and bubble immediately, you're good to go). drop your fries in. The only pointer I can give is to NOT overcrowd your pan with fries because it will bring the temperature of the oil down causing your potatoes to steam in oil instead of fry. Also, once you drop them in, spread them around the pan and then leave. Them. Alone. Don't start poking and trying to turns your potatoes too early cause they will break. Don't freak out if they momentarily stick to the bottom of the pan. They will unstick once they cook. Once they start to become a nice golden color, turn them. All you're trying to do is making sure that the cook evenly on each side. Your heat is important. You don't want your fries to get color too fast without them being cooked thoroughly inside. You want your oil on a steady medium to high heat. If your oil is smoking up, then lower your heat.

    Alright so now you're done! Once your fries are done place them in a bowl with some kitchen towels so they can absorb any excess oil and you're ready to go to town. I personally love putting the sauce all over the fries as well as the chicken and sprinkling some parmezan or pecorino romano cheese over it all.

    Soooo good and garlicky. Again, sorry for the craptastic pics....but the taste made up for it!


Friday, March 9, 2012

Fun with Zuuchini

       OK the title might be a little misleading...I'm not about to show you how to make swans and juggling monkeys out of zucchini shavings or anything....but I DID make two meals out of this oh so deelish veggie today. :D

Go me.
 
 Now, zucchini doesn't really have much of a taste. It pretty much tastes like water since there is so much of it in the vegetable but I still love it. I've always loved zucchini...maybe it's a Greek thing. We love to slice this bastard and fry it up in some olive oil. We love to steam it and drown it in oil and lemon juice. And we love to do this next dish to it as well. It's basically zucchini cooked in tomatoes and I personally like to jazz it up with some mushrooms and red peppers as well.

   It's simple dimple. You heat up a generous amount of extra virgin olive oil in a pot and sautee some diced onions (garlic can also be added as well). Once those have a nice color on them, add your mushrooms of choice. Let the water evaporate from those suckers before you add the rest of the ingredients. Once the majority of your mushroom water has evaporated, add you zucchini, red peppers and fresh tomatoes (grated), some chopped up parsley and a few dried crushed chilies if you like some heat. Also, another great addition to this would be some diced up potatoes. Try and have the size of your zucchini and potatoes be the same so they can cook at the same time.  Salt and pepper and bring to a boil.


Love me some olive oil
       Once the liquid in the pot has started to boil, reduce your heat to a simmer and let it cook. It is important to avoid stirring as much as possible while this is cooking, especially towards the end. Zucchini is a pretty delicate veggie and can break apart easily so best thing to do is grab the handles of your pot and gently swirl it's contents. Your zucchini is ready when all the veggies are cooked and all the water from the water has evaporated. There is never a need to add water or any liquid whenever you're cooking veggies like zucchini because there is so much water contained in them that a lot of it is released in the cooking process which aids in cooking it as it evaporates.  Now if the veggies are done but there is still a bit of water, you can turn up the heat to high and have the water evaporate out faster but be careful when doing this. If you need to do this, keep an eye on your veggies so they don't end up being scorched  on the bottom and also you don't want to do this for too long because your veggies will end up being overcooked and mushy.  So yeah, it was delicious and healthy and you can enjoy it as is with some feta cheese crumbled on top and some fresh bread for dipping or it can make a perfect side dish to any type of meat or fish you are preparing (stew meat goes great with this as well).


   We had some left over and for a snack, I just heated up some flour tortillas, added some feta and some mashed up zucchini and called it a noche. Simple, fast, easy and yummy.


Definitely not reinventing the wheel here but simple (not to mention healthy) home cooked is just the best. Get creative, add whatever else you desire to this. Go crazy and ENJOY!!


Monday, March 5, 2012

Attack of the delicious Giant beans...


 This dish, my friends, is one of my most favorite Greek dishes. Evar. I simply love the flavor of the baked beans, "Gigantes" as they are called in Greece, (which translated to Giants because of their large size. Why thank you, Captain Obvious). Now I think every household in Greece will probably give you a somewhat altered recipe for this meal but I honestly don't think there is a standard recipe for it. And if there is, well screw recipes anyway...;-)

   Gigantes are basically beans cooked to perfection along with a variety of vegetables of choice (you don't even have to use these specific beans if you think about it...). I've had many Gigandes but my father's are by far my most favorite. The process and ingredients in making this are so straightforward and simple and the outcome is so flavorful...what's not to love!? (well, you might not love beans...in that case...don't even bother...). Now, this is a vegetarian meal. I eat meat but I definitely don't need to have it in EVERY meal because of reasons like the ones shown below. It's just not needed. HOWEVER, I must say that an even better version of these Gigantes is to add some good quality smoked sausage (spicy, if you're up for it) in this mix. It's also a perfect side dish to any roast or pork ribs...think of it as a healthier-but-tastier version of traditional baked beans (without the ton of added sugar and corn syrup).Well, that last bit only applies to Americans. They know what I'm talking about (holler.)

     So, like all beans, soak them over night in some water. The next day, place them in a pot and fill the pot with water until they are covered plus a few more fingers worth and place them to medium high head and let them simmer. Make sure to salt them and add a bay leaf or two. Once they are about 3/4 of the way done. take them off the heat. In the meantime, cut up your veggies in medium sized, uniform pieces. You can use a range of different veggies, what we personally like to use are red peppers, parsnips (yes parsnips, their flavor is divine), onions, tomatoes (fresh tomatoes. pulped...none of that canned business), carrots, celery (leaves and stems), and parsley. Oh, and if you can stand some heat, some crushed dried red chilies. A bit of spiciness makes this dish that much tastier.  Place them in a pan, salt and pepper and drizzle with olive oil (and when I saw drizzle...I really mean generously pour). It should look something like this:


  Now, take your beans and add them to this lovely vegetable party. After you add all your beans, add some of the liquid you cooked your beans in. Now you could use water in this step but why the hell would you use something tasteless when you can use the actual liquid that the main ingredient of the meal was partially cooked in? Right? Right. If you have some vegetable stock laying around you could most certainly use a little bit of that as well. Add liquid until it is a little over half way filled. Now it should look something like this:

We ladled some liquid out. .

   Now, pop this in a preheated oven of about 175C/350F. It'll probably take about an hour to and hour and a half to finish cooking. No need to rush it, make sure to check from time to time on the status of the liquid (if you see the beans are looking a bit dry, you can add some liquid to moisten them back up).  This dish is ready when the beans and the vegetables are nice and soft and it's sauce is thick.

     I also want to add a little side note: this exact meal can also be made into a soup. A soup that we call "Fasolada" in Greece. Same ingredients can be used except that instead of put them in the oven, you basically add all the vegetables in the pot with the nearly cooked beans and let it all simmer. You'll just have to add a little bit more liquid to maintain a soup consistency but it is a fantastic meal for a rainy day.:D
       
Now, the only thing left to do is to devour this bitch. :)
ENJOY!!! 
Nom


Nom

NOM


Saturday, March 3, 2012

Chickeny-Eggy-Lemony Soup


      I swear, there is nothing better than having this soup on a rainy day. If you like tangy soups, you'll love this. Every time I eat it, it takes me back to my childhood years and I think of the countless times I would come home from school on a rainy day and my grandma would have this soup ready for me. Till this day it is my most favorite soup. :) Here in Greece, we call it Avgolemono which literally translates to Egglemon and it's so easy to make, it's not even funny. I'm not even gonna bother with an actual recipe. It's literally chicken, chicken stock, carrots, rice, eggs and lemon.
  
Stock
   Make a nice, rich homemade chicken stock. Cook your chicken breast in it with some carrots and a bay lead or two. When done, take out and shred. Meanwhile, add the rice in the stock and simmer. Remember, the amount of rice you put in will soak up about double the amount in liquid so careful not to add too much rice where you'll end up with just rice and no soup! Having said that, you can make this soup as thick as you want, it will all depend on how much rice you put in (and don't forget the eggs you will add will thicken the soup up some as well). Once your rice is cooked, add your chicken back in. In a bowl beat an egg or two (or 3 or 10...depending on how much soup you're making :-p) and add a generous amount of lemon juice in it. Now, the only challenging thing to this soup is the next one. TEMPER your eggs with some warm soup. If you just dump the egg/lemon juice mix straight into the soup, you'll literally have scrambled eggs in it...and that's not sexy.
      
      So, while beating your eggs, add a little amount of soup at a time until you temperature of your
 eggs is the same as the soup's. Now, you can pour the egg mix into the rest of the soup. You're done!! Another great thing to add at this point is some chopped up dill. I'm a sucker for it but this time around, we didn't have any so we just had to do without. It's a great addition to this soup however, gives it a fantastic aroma and enhanced the flavor that much more so I highly recommend it. Just a word of caution: if you plan on eating this another day, be careful when heating it up. Heat the soup up on low heat and never let it get to a boil because your soup will break and like i said before...not sexy.                                                               


ENJOY :)


Wednesday, February 29, 2012

The exotic treat that is... Baklava


  I gotta admit, I was never a huge fan of Baklava (was being the key word here). I mean don't get me wrong, there are some amazing pastry shops in Greece that make a mean Baklava but when it came to desserts, I don't think I ever told myself "Hey, you know what I REALLY want right now? Some damn baklava". Yeah, no...that sentence was usually applied to cheesecake. MMmmmm, cheesecake.....


   Ok back to the topic at hand here! The history of baklava is a somewhat foggy one. Some say it's Greek, some say it's Turkish, some say it's Persian....who the hell really knows? What we do know for sure is that it's a popular dessert in many countries in much of central and southwest Asia as well as Greece and although its recipes changes from region to region, it is usually some variation of chopped nuts, filo dough, spices and syrup or honey.  Besides, screw it's history- what's important is that its here, it's easy to make and it's *SO* worth making it at home instead of buying it.


   What's so great about it is that it's one of those desserts that don't need exact measurements. There's no baking powders or sodas to deal with so it's very forgiving in the measurements department. I had never made baklava before from scratch and so my father decided to show me some moons ago. In a nutshell you literally line a pan with filo dough and butter and sprinkle a little of the nut mixture after each filo sheet.


   More specifically, you start out with about a pack of butter and you clarify it. Clarifying butter is easy, you get a pot and fill it about 1/4 of the way with water, set it to simmer. Then get a bowl that will rest comfortably on the top of the pot and put the butter in it. The heat from the simmering water will melt the butter. Make sure to not disturb the bowl, let the butter melt completely. In the process, you will see the water solids sinking to the bottom of the bowl. Once all the butter is melted, carefully take the bowl and slowly pour out the now clarified butter. Be careful not to incorporate any water solids into the new container where you are pouring your butter in. It is important that the filo is brushed with pure butter in order for it to become nice and crispy while baking.
   
Take your choice of nuts and ground them up well. Which nuts you want to use...well it's all about personal preference in this department. Some use almonds, some use walnuts, some use pistachios...some use a mixture of 2 or all 3! We used almonds because it's what we had at that moment. So, ground them up and mix in some cinnamon, nutmeg and sugar.

       Note that you can make your simple syrup ahead of time. It's best for the syrup to be cold when your baklava is ready and hot from the oven. It's a 2:1 sugar to water ratio and for a medium sized pan you'll probably need about 4 cups sugar to 2 cups water. Put you sugar water mix on medium high heat. You can also get a bit creative and add a piece or two of clove, a cinnamon stick and/or some lemon or orange zest ( and just a bit of lemon juice, helps prevent crystallization of the sugar). Let it simmer until its a light syrup consistency. You don't want it too thick because it'll be hard for the syrup to reach every little nook and cranny of the baklava. Once it's ready, set it aside and let it cool.
  
    Now the fun starts! Take the pan you have chosen to use and butter it generously with a pastry brush. Then start layering the filo dough in it, making sure to butter every single filo layer before adding the next one. Add a good 6-7 sheets of filo dough before you start spreading the nut mixture, you want a nice firm base for your pastry. Once you have those sheets in the pan and buttered, start lightly dispersing the nut mix between each filo layers, literally just enough to cover the filo. It might look like a small amount but trust me, it adds up when adding the mix on top of each filo layer. 


    Filo, butter, nuts, filo, butter nuts....and so it goes. Make sure, again that the last 6 or so layers of filo are just butter and filo. Now, with baklava, you MUST cut this pastry into pieces before putting it in the oven. If you attempt to cut it after it is baked, you will end up with a shattered mess. The baklava needs to me ready cut so when its ready from the oven, you can immediately pour the syrup in it. Now cutting the baklava beforehand is easy as long as you follow this one easy step. Once you're done layering and you baklava is ready, place it in the fridge for a good 10 minutes or so. This will harden the butter and chill the filo dough making it a whole lot easier to cut than if you tried cutting it at room temperature.  


   Once you've cut your baklava into the desirable pieces, place it in a preheated 175C/350F, no fan. You don't want too high of a heat for this because you don't want the top and round of the dessert to get too dark before the inside does. Your baklava will be baking for about an hour and a half but make sure to keep an eye on it after about 45-50 minutes. If at any point you notice the top getting golden brown before the inside is cooked, just cover it with some aluminum foil and continue to bake. Once your baklava is ready, take it out of the oven and let it rest for about 5 minutes and then proceed to adding the cooled syrup.  Evenly pour all over the pastry in a few doses. Once you're finished, let the baklava sit, I suggest you devour it the next day, if you can wait that long. These desserts are always best when they have cooled off completely and all the ingredients have had their time to really enhance each other.  \\


                                 Good luck and ENJOY!